


Table Of Contents
Replacing Your Mixer Taps Washer
If your mixer tap is dripping or leaking, as a homeowner or landlord, the best way to resolve this issue is by changing the washer. This is necessary because the primary cause of a leaking tap is a damaged washer. With time the washer wears down because of frequent use. Luckily, changing the washer is not complicated at all. This article looks at how to change tap washers on a mixer tap. Read on for a chance to hone your DIY skills, save on money that you would otherwise spend on a plumber, and prevent wastage of water caused by the dripping.
How Does A Mixer Tap Work?
Mixer taps are standard in most new and renovated homes in Australia. Mixer taps have a single faucet and a tap handle. Both hot and cold water is controlled using a single handle and comes out of the same spout. There are different types of mixer taps, including wall-mounted, single lever, Monobloc, and pull-out. You can find mixer taps in various parts of your house, namely the kitchen, basin, bathtub, and shower.
Unlike the conventional tap washer, mixer taps feature a ceramic cartridge with two discs. The upper disc usually rotates when the handle moves, making it possible for water to flow through while the bottom disc is fixed. Ceramic discs are more long-lasting than rubber washers. However, they are still prone to leaks and cracks.
What Is A Tap Washer?
Also referred to as packing or sealing washers, tap washers are disc-shaped devices with a central opening or hole. They help seal off mains water flow behind a tap when you turn it off. The washers are found in tool boxes or plumbing kits and provide a quick solution when your tap is leaking, dripping, or becomes difficult to open or close. As far as types go, there are hot water tap washers, basin mixer tap washers, kitchen tap washers, mix tap washers, outside tap washers, and pillar tap washers.
Tap washers work by creating an impenetrable physical barrier between the spout and tap seat. Most of them are also designed in a way that they fill any irregular-shaped voids in tap settings. This makes them seal off the spout from the tap valve. They are made from easy-to-compress and squeeze materials to create a watertight seal. This makes it possible for the tap washer to seal off the valve opening effectively.
Types Of Mixer Tap Washers
Generally, mixer tap washers should be flexible and waterproof. They are mainly made of polythene, nylon, rubber, or fibre. The materials used are bound to deteriorate with time, thus necessitating replacement. Before going into how to replace leaking mixer tap washers, let’s look at the different types.
Nylon tap washers
Nylon mixer tap washers are the most popular option because of their high reliability. These washers are resistant to wear, are strong, and feature low surface friction because of their internal lubrication. Internal lubrication also plays a massive role in making the washers last longer. These washers are lightweight and more cost-effective than most of the other types. In addition, they are not reactive to other substances and can withstand hot water.
Polythene or rubber tap washers
Polythene or rubber tap washers are used in all baths, basins, and shower mixer taps. They are available in different sizes and are long-lasting but softer than nylon, and are used on taps made with hard materials. They are malleable, meaning they can be malformed or distorted with frequent use. Exposure to water, air, and regular compressions makes the rubber split, crumble or crack. This can lead to leaking and dripping.
Fibre tap washers
Also referred to as vulcanised fibre tap washers, they are hard because they are treated using sulphur at high temperatures. When wet, they expand, making them stand out from other types of washers. This expansion makes them the most effective sealant. Fibre tap washers are also easier to compress than their rubber and nylon counterparts, making them less prone to damage when overtightened.
Ceramic tap washers
These washers are made of fire-hardened ceramics. Ceramic tap washers feature two discs, one that remains stationary and the other that moves up and down and side to side. They are easy to control and move. Besides, they are the most durable and hardest tap washers. Ceramic, a fire-hardened material is erosion-resistant and tough, leading to less friction when operating it.
Guide To Change A Tap Washer On A Mixer Tap
Mixer taps have three distinct areas when doing replacement or repairs. Individual water control for cold or hot on either side is replaced by separate taps. When repairing a mixer tap, the spout is usually the weak link; sometimes, you may find it leaking at the base.
Here are the steps to follow to change a tap washer:
Tools and materials needed
- A flat-headed screwdriver
- A spanner
- An old towel, cloth, or rags
- New tap washer
Step One: Cut off the water supply
You should start by isolating the water supply to your tap so that you can work on it. Check for the mains stop cock and switch the valve off. The mains stop cock is usually located under the kitchen sink. Then, drain your system; you want to do so by running the mixer tap to be replaced until it is empty.
Step Two: Remove the tap’s headgear
A dual tap mixer features two handles on either side of the spout. One handle is for cold water while the other is for hot water. When removing the tap headgear, you may also decide to replace or check the washer in the two handles. This ensures you do not have to waste time later on replacing the washers.
At the top of your mixer tap, you find caps or covers. The covers may be blue or red. Remove them carefully with a fine blade flat-headed screwdriver. Under the cap, you will find the screw. Hold the head of the tap in one hand and then loosen the screw to take out the headgear assembly. Then, remove the tap valve using your adjustable spanner.
Step Three: Remove the spout from the mixer tap
You may have a big snap ring between the spout and the body hidden by a skirt that screws down or is held in place with a small screw at the back. The snap ring can be removed or closed using a pair of pliers. Sometimes you find a small grub screw at the back that allows the spout to be pulled upward from the body when undone.
There are also mixer spouts without any fixing holding them in. This mixer tap makes it easy for you to pull up on the spout and then release it from the grip of the seal located at the spout bottom.
Step Four: Replace the seal
The seal ring is prone to deterioration over time, causing leaks. This mainly occurs at the bottom of the spout. Therefore, it’s necessary to replace the seal ring to avoid current or future leaks. Once you take out the spout, you should look down inside the neck and find the seal ring. You should be able to remove it with your finger. However, if you are unable, you can use a small flat-edge screwdriver to hook it out.
Step Five: Remove the washer and O ring
Check the O rings on the valve’s body and the washer at the base. Use the tip of your screwdriver to remove the O rings. The washer is usually made to help keep the tap base watertight. The washer may or may not have a hole. Carefully remove the washer with the end of your screwdriver. Ensure that you are careful to avoid injuring yourself in the process.
Your valve may have several O rings. Check to make sure that they are in perfect condition. You do not have to replace all of them at once. Instead, replace only the ones that are not in good condition. If necessary, you can apply some grease for lubrication purposes. Then, screw all the parts tightly together to avoid leakage.
Step Six: Install the new washer and then replace the tap
After you have removed the old washer and the damaged O rings, it’s time to replace the washer. Ensure that the new O rings are in position and the headgear well secured. Before replacing the gear, look at the tap seat, which is the surface of the mixer tap where the washer is positioned.
If the surface is damaged, it can cause leaks. You should get a tap reseater to repair it if it is damaged. Place the new washer onto your valve and effectively lubricate the assembly. Then, screw the headgear back to its position and use a spanner to tighten the tap. From there, you can replace the tap handle, tighten the screw and get the plastic cap back in place.
Do the same on the other mixer tap and test whether your system is working perfectly. The mixer tap should be leak free. After you have replaced the washer, make sure you open the tap again to allow water to flow. This will ensure you check and confirm that the mixer tap is not leaking or dripping.
Choosing The Right Tap Washers
When replacing tap washers, you need to choose the ones that will work perfectly for your mixer type. They need to be identical and the same size as the one you intend to remove. Measure the washers and O rings with a tape measure or calipers. Other factors you should consider include the tap washer’s durability, flexibility, cost, and other factors. More importantly, it’s advisable to look for a washer that will work perfectly for your specific mixer tap.
In addition, check for the highest quality washers to ensure you don’t keep replacing them frequently, which in turn saves on the costs involved. Another important thing is to ensure you buy the washer from a reputable plumber or supplier. This ensures you get the best quality washers that will last a long time.
Tap Washer Replacement For Your Mixer Tap
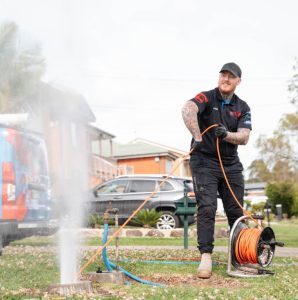
To get the best results when replacing washers on a mixer tap, it’s advisable to leave the job to a professional plumbing company near you. The job might look simple, but you do not have to risk doing it yourself to avoid causing more damage to your mixer tap. Professional plumbers have the right skills and use the right plumbing tools, so you can expect them to offer high-quality work.
Look for a plumber with a good review history among property owners in your area. This way, you will have peace of mind knowing that you are in the safe hands of a reliable plumber. You can also be assured that your home will be free from frequent tap leaking and dripping that could cause massive water damage.