


Table Of Contents
Almost every kitchen in modern homes has a built-in dishwasher. However, if you buy a house and the kitchen does not have a dishwasher, you can have a reconstruction to accommodate one. Adding a new dishwasher to your kitchen is a way of updating your kitchen and making it more functional. Installing a dishwasher in your kitchen for the first time might seem costly, rigorous, and overwhelming, however knowing the required steps to take will make it easier.
Essential Requirements for a Dishwasher
Cabinet Space
Ensure that you get cabinet space that is suitable for your dishwasher of choice. Standard built-in dishwashers are 24 inches wide, 24 inches deep, 30 inches in height and have adjustable legs to accommodate different countertops. Dishwashers from several brands might differ in their measurements. Therefore, you should measure your cabinet space before buying a dishwasher to get a suitable size for your kitchen.
Below are some of the things that you should keep in mind while choosing cabinet space:
- Keeping your dishwasher next to the sink (either on the left or right side) will make the scrape-rinse-load action easier.
- Choose a cabinet space close to a storage drawer for your crockery, plates and cutlery.
- Ensure that the intended position of your dishwasher allows freedom of movement in your kitchen.
- If you are tall and dislike bending over, you can install your dishwasher in taller cabinets that have storage drawers below them.
- Integrated dishwasher designs are suitable for kitchens with small spaces.
- Freestanding dishwashers are suitable for spacious kitchens, large families and rented apartments.
Water Supply
A dishwasher requires hot water to clean your dirty dishes, and the nearest source of hot water is the shutoff valve under the sink. Replace the hot water shut off valve under the sink with a dual shut off valve that connects the sink and the dishwasher to your home’s hot water supply pipe.
To connect water from the shutoff valve to your dishwasher, use the water supply tube attached to your new dishwasher unit or a long braided steel dishwasher water line. You can get a long braided steel dishwasher water line from a plumbing supply and hardware store.
Drain Line
A dishwasher requires a drain line to get rid of the dirty water after cleaning the dirty dishes. Dishwasher units usually include a drain hose that connects the dishwasher to a garbage disposer or the drain under your kitchen sink. If you do not have a garbage disposal unit, all you need to do is replace the straight tailpiece that connects your sink to the drain with a Y-shaped tailpiece that will connect your dishwasher and the sink to the drain beneath your kitchen sink. Ensure to secure your drain hose connections with a hose clamp.
Power Supply
Electrical hook-ups are needed to power up your dishwasher. Your local building codes might require a dishwasher to have a separate electrical circuit breaker that it can share with a garbage disposer. The size of the circuit breaker and its wire will depend on the amount of electrical load the dishwasher draws. These electrical hook-ups Will require connections at the access panel located at the front bottom of the dishwasher. Make use of an armoured cable if you intend to mount the electrical circuit box on a surface. Employ the services of an expert for electrical hookups.
Air Gap
Many local building codes require a dishwasher to connect to a garbage disposer or a drain through an air gap. An air gap helps to prevent wastewater from flowing back into your dishwasher. You will need to purchase an air gap separately as it does not come with a dishwasher unit. It is usually mounted on top of your kitchen sink and might require new wiring.
To replace an existing dishwasher or install a new one, you need the following tools and materials:
Tools
- Adjustable wrench or channel lock pliers
- Teflon tape or thread seal tape
- Voltage tester
- Brass fittings
- Duct tape
- Hammer
- Torpedo level
- Screwdrivers
- Wood screw
Materials
- New dishwasher
- Wire connectors
- Dishwasher tailpiece
- Dishwasher user manual
- Hose clamp
- Bucket or a bowl
- Braided steel water line
- Dual outlet shut off valve
- Electric appliance cord
- Cardboard or a blanket
Replacement and Installation of a Dishwasher
Before you start, you should cover your kitchen floors with cardboard, a blanket or an old rug to protect your kitchen floors.
Step 1: Remove your Old Dishwasher
This step is essential for replacing an already existing dishwasher. Do the following before removing your old dishwasher:
- Shut off the dishwasher from the main power panel. You can switch it off and unplug it from the main power socket located under your kitchen sink.
- Shut off the water supply to the dishwasher by turning off the hot water shut off valve under the kitchen sink. You can also shut it off from the water heater.
- Consider removing the cabinet doors to gain free access to your built-in dishwasher and to make disconnections easier.
- Next, unscrew the access panel located at the front bottom of your dishwasher with a screwdriver. Use a voltage detector to check and ensure that the access panel is void of electrical power. Proceed to disconnect all the wiring connections and get rid of the old wires. You can reuse the cables that are in good condition and equally keep the cable clamp for reuse.
- Remove the brass fitting and nut ring securing the water supply line with an adjustable wrench and disconnect it from your dishwasher. Then, place a bucket or a bowl underneath it to catch any water that comes out after the disconnection.
- Wipe off any water in the dishwasher with a piece of foam or with a sponge, then disconnect the drain hose from your dishwasher.
- Lastly, unscrew the screws holding the dishwasher in place at the bottom of the countertop.
- Carefully pull out the old dishwasher, lay it aside until you are ready to dispose of it. Lowering the dishwasher a bit will give you more space and clearance to slide it out.
Note: Skip this step if you are installing a dishwasher for the first time in your kitchen.
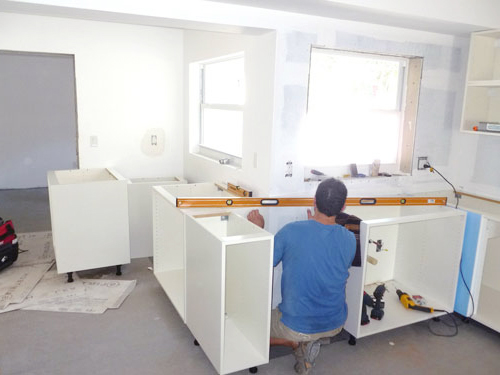
Step 2: Prepare for the New Installation
- Start by unpacking your new dishwasher close to the installation location. The new dishwasher unit will come with a water supply valve, a new drain hose and a user manual containing the manufacturer’s instructions on how to adjust the legs of the dishwasher to fit into your cabinet space.
- Now go through the manufacturer’s instructions to get a glimpse of how to install your new unit.
- If it is a first time installation, you will need to drill three holes at the edges of your cabinet space; one hole to pass the electrical wiring, another for the water supply line, and the last one for the drain line.
- You can refer to your dishwasher manual to know where to drill the holes and the diameter of the holes. In the case of a dishwasher replacement, you should use the existing cabinet holes.
Step 3: Install the Electrical Circuit Breaker
As mentioned earlier, some local building codes require your dishwasher to have a separate electrical circuit breaker. You should consider getting an electrician to wire a circuit breaker from your home’s main electrical circuit control panel to your kitchen for your first-time dishwasher installation.
- For a circuit breaker installation, start by drilling a hole into the kitchen floor at the dishwasher cabinet space then run a 12AWG cable from the dishwasher space to your home electrical control panel. Ensure that you leave at least 5 – 6 feet of the cable sticking out from the floor hole and secure it in position with duct tape to prevent it from slipping back into the hole.
- Make the final installations and wiring connections into the electrical control panel. Ensure you turn off your electrical main control switch before making the connections.
Step 4: Connect the Water Supply Line, Drain Line, and Electrical Line
- Lay your new dishwasher on its back to gain easy access to the electrical and plumbing connection panel.
To connect the water supply line:
- In the case of a dishwasher replacement, disconnect the old water supply line from the shutoff valve.
- For a first-time dishwasher installation, replace the hot water shut off valve under your kitchen sink with a dual shutoff valve that will supply hot water to your kitchen sink and dishwasher.
- Next, pass the new water supply line through the water supply hole drilled in the cabinet, connect one end of the water supply line to the dishwasher water inlet valve and connect the other end to the shut-off valve.
- Now secure the water valve with a brass fitting and use Teflon tape or thread seal tape on both ends of the line to prevent water leakage.
- Temporarily secure the connected water supply line to the floor with duct tape to prevent it from moving out of place when sliding the dishwasher into the cabinet space.
To connect the drain hose:
- Disconnect the old drain hose from the sink tailpiece or the garbage disposer if it is a dishwasher replacement.
- Next, pass the new drain hose through the cabinet hole, connect one end to the dishwasher and the other end to an air gap and then to the garbage disposer or a tailpiece connected to the drain.
- In the absence of an air gap, configure a high loop with the dishwasher drain hose before connecting it to a garbage disposer or a tailpiece. A high loop configuration has the same function as an air gap. An air gap is usually mounted on top of the sink or at the countertop.
- To fix the drain hose to the garbage disposer, use a hammer and a screwdriver to punch out the knockout plug (a plastic disc) from inside the garbage disposer chamber.
For the electrical hook-ups:
- Unscrew the access panel in front of the dishwasher with a screwdriver and remove the bolt on the metal junction box at the right side of the access panel unit. Inside this metal junction box, you will find a hole. Once you locate the hole, install the circuit cable with a cable clamp.
- Pass the 5 – 6 inches of the 12AWG cable wired from your home electrical control panel through the cable clamp and tighten the clamp onto the cable securing it.
- Now, feed the secured cable into the hole and install the locknut back to secure the clamp.
- Strip the cable wire with a utility knife, then connect the black (hot water) wire of the cable to the black wire in the junction box with the help of an electrical wire nut, the white (neutral) wire to the white wire in the junction box with another wire nut, and the green wire around the green ground wire in the box and tighten them with a screw.
- Tuck the connections into the junction box and screw back the bolts to keep it securely closed.
- Close back the access panel.
Step 5: Set Up the Dishwasher
- Use a torpedo level to adjust the front legs of the dishwasher to enable the height to fit into the cabinet space.
- Gently slide the dishwasher into place. Ensure that you position it centrally it while doing so. You should also ensure that you watch out for the water supply line, the drain hose and the electrical cable while sliding it into place.
- Proceed to secure your dishwasher into the cabinet by driving screws into the brackets provided with the dishwasher unit.
Step 6: Check Out your Dishwasher’s Operation
- Switch on the circuit breaker and check the dishwasher’s electrical connections.
- Start a dishwashing cycle, allow the dishwasher to be filled with water and check it for water leakage.
- Press the cancel button after a while to stop the dishwashing cycle. Allow it to complete the drain cycle and check for leaks at the drain pipe and around your dishwasher. If there are no leaks, you did a great job. See, it’s not that difficult as long as you follow the above steps to a T.
Replacing a dishwasher and installing a new one involves almost the same steps. As a homeowner, if you have basic knowledge of plumbing and electrical works you can easily install a dishwasher. Otherwise, have the dishwasher plumbing professionally installed.